Make a Bird Feeder
Woolpets' frosted, plastic kit containers can be recycled but why not make a bird feeder instead! Mr. Woolpets shows you how to turn the wire-handled packaging into a diner for your backyard birds.

Let's Get Started

Step 1: Here’s what you’ll need - 2 pairs of pliers, permanent marker, X-acto knife, round container to trace around (3” in diameter), a nail, hole punch, a stick or dowel (1/4” in diameter and 5” long) and cardboard to work on.

Step 2: First peel off the labels from your take out box. Using a pair of pliers, bend the wire handle on the inside of the box so that you can easily remove it. Set the wire handle aside.

Step 3: Flatten out the take out box on your cardboard work surface as best as you can.

Step 4: The openings are going to be located on the panels right underneath the top flaps that hook together. Use a can or small round dish and place it near the top of the panel – leave about an inch near the bottom.

Step 5: Using a permanent marker – trace a circle on the opening panel. A fine point permanent marker works best.

Step 6: Trace another circle on the opposite panel remembering to leave about an inch of space near the bottom of the take out box.

Step 7: Secure the take out box to your cardboard work surface – I used tacks but masking tape would do the trick. This is just to keep the box from sliding around when cutting out the openings.
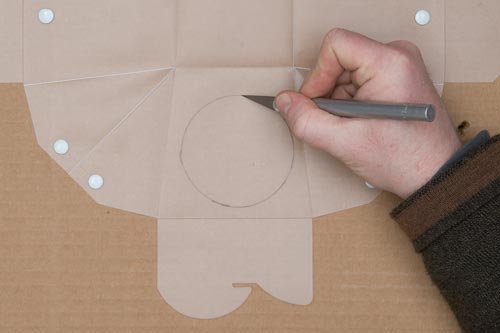
Step 8: Using an x-acto knife carefully trace around the first circle. You shouldn’t try to cut all the way through the plastic the first time around – just score the surface on the first pass. Take your time – it may take three passes to cut all the way through.

Step 9: Repeat the cutting process on the opposite side of the box.

Step 10: Using a nail – punch holes in the bottom panel of the box. This will let out any rainwater that happens to find its way into the feeder.

Step 11: Ok, now we need to make two holes for the stick or dowel to go through. Use the hole punch to make a hole in between the opening you cut out and the bottom of the box. Repeat on the opposite side

Step 12: Take your wire handle and make a small mark with your permanent marker in the middle of the handle.

Step 13: Using both pair of pliers, bend a kink at the mark you placed on the wire handle.
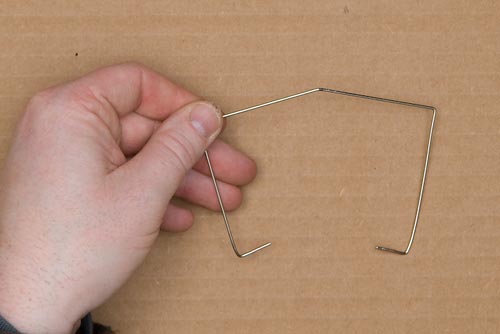
Step 14: Your wire handle should look like the picture above. This will keep the feeder from sliding around when you hang it up.

Step 15: Fold your box back together and line the small holes up on the side of the box. Feed one end of the wire handle through these small holes and bend it up so that the box stays together.

Step 16: Insert the other end of the wire handle into the small holes on the other side of the box and bend it to keep the box together.

Step 17: Take a dowel or stick about 5 in. long and feed it through the small holes under the openings you cut out. Be careful not to tear the plastic when pushing the stick through the feeder.

Step 18: Hey – that’s it, you’re done. Put some birdseed in it and hang it up. The birds will thank you.